DIY woodworking projects are fantastic opportunities to spend quality time with your children, while also teaching them valuable life skills
—
Many adults love spending their evenings and weekends on DIY (Do It Yourself) projects, but often don’t consider bringing their kids in on the fun. Children love to create things with their hands and doing a DIY woodworking project with them is a great opportunity to teach them some valuable lessons while having a blast in the process.
As a parent, there are many reasons to introduce your children to woodworking. If you have a few spare hours with your children on a weekend, turn off the TV and shut down the iPads.
Even in its most basic form, encouraging them to create something with their hands produces amazing benefits and wonderful lifelong memories.
Many of these projects only take an afternoon, but because a project leaves you with a tangible product when done, your memories will be relived every time you or your child see or use the finished product.
Often times, a project is less about the destination and more about the journey. This is especially true when working on wood projects. In the end, you will have equipped your child with stories of how they overcame adversity, solved problems, and worked towards a goal to build something. These building blocks will serve them well as they age.
Benefits to Kids
There are so many ways that your child will benefit from working with you on a DIY project. Here are a few:
- Learn to work with their hands — More and more nowadays, children are not given opportunities to work with their hands. Tactile classes in schools are being replaced with college prep courses, and video games are replacing exploring outdoors. Working on a DIY project gives your kids a chance to work with hands and learn valuable life skills.
- Learn to envision with their mind — Beyond learning to use their hands, woodworking teaches a child to explore possibilities with their mind. Following a set of plans is one thing but learning how each step contributes to the finished product is much different.
- Learn to finish a project — A project gives children a great opportunity to complete what they start since projects have natural starting and ending points. As a result, your child will learn how to work towards a goal, a skill that will positively impact their career and their relationships.
- Learn to be resourceful — Instead of teaching your kids to buy something new each and every time you want something, a DIY project teaches your child to be resourceful and to make use of what they have.
- Learn to be creative — While many DIY projects come with intricate plans that are simple to follow, many require a lot of creativity. Sometimes you don’t always have the perfect tools and materials on hand to do what is needed which encourages adaptability and flexibility.
- Learn to appreciate the finished product — When you complete a level on a video game, there is nothing tactile to remind you of your accomplishment. When you finish a DIY project, however, you get to enjoy the tangible fruits of your labor in the future.
Pick A Project
When it comes to picking projects to do with your child, be mindful of their age-appropriate capabilities. This can be a bit of a moving target, particularly when you throw in multiple kids of different ages and skills. Once you’ve found an age-appropriate project, here are a few other key factors to keep in mind:
1. Basic Tools
Don’t pick a project that requires a bunch of complicated and expensive tools in order to complete it. If possible, make sure that the project you pick allows your kid to actually use the required tool. Basic power tools, such as a jigsaw and sander, are possible for kids in grade school to use with proper supervision. Hammering and screwing are also acceptable for grade school ages. If you have to use a more extensive tool, take the opportunity to explain the safety features to your child. While they might not be able to use the tool now, it will help to build a healthy appreciation for the importance of safety down the road.
2. Keep It Simple
Let’s face it, children can get bored fairly easily. And there’s no need to be romantic about it — DIY projects can be a bit tedious, especially for a child. Because of this, pick a project that doesn’t have pages and pages of steps to complete. As your children age, feel free to extend the number of steps. A shorter number of steps ensures project completion, which is obviously a high priority.
3. Minimize Finish Work
Finish work is the sanding, priming, painting, and staining that often goes into certain types of projects. Exercise caution when picking projects that require a lot of finish work, as they can put a damper on the tail end of the project since finish work is time consuming. Finish work is also a lot harder to do when you’re not an expert. Whenever I’ve opted to do a project with my daughter that had a lot of finish work, I ended up doing it all myself. While this certainly isn’t always the case, its something to be wary of.
Sample Projects
You can start doing these projects with your kids when they are just toddlers and add more and more sophistication to the projects as they grow older. While there are numerous potential projects to tackle with your children, here are a few of my favorites:
Popsicle Stick Paper Lantern

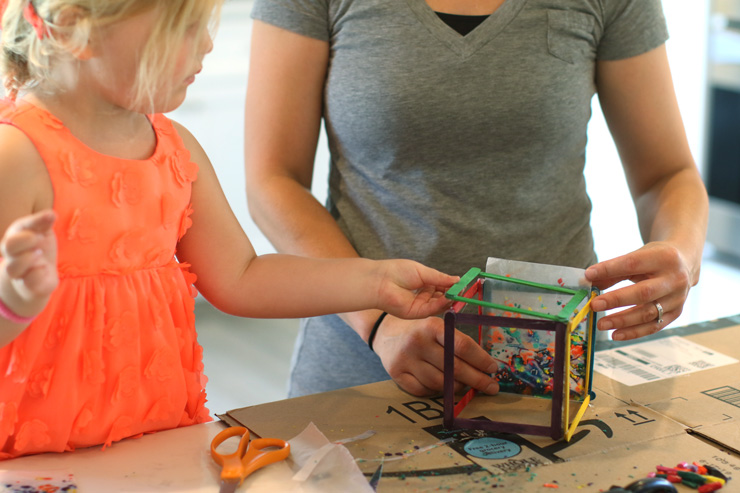
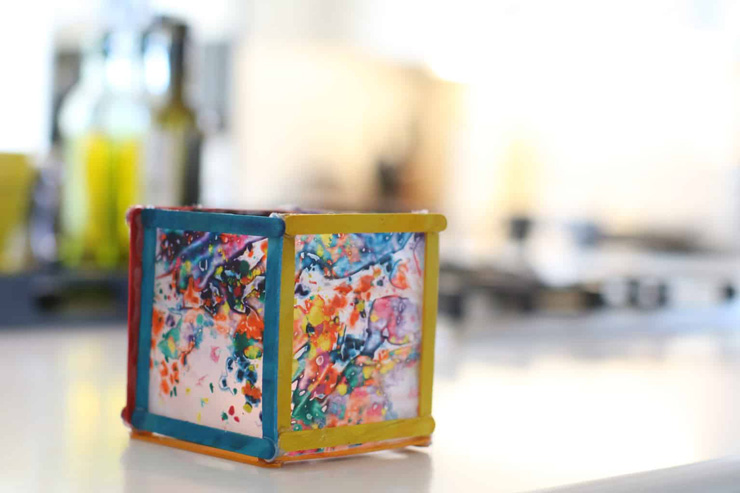
This DIY project is suitable for toddlers and young children. It leaves you with a really neat and ornate lantern with the feel of a stained glass that you can put candles inside of. Young kids love this project, as its easy to do, doesn’t have many steps, and bursts with bright colors!
Supplies you’ll need include a bunch of crayons, some wax paper, along with popsicle sticks and wood glue. Creating the stained glass involves using a hot iron, so that will be one step an adult will definitely want to take on. This project is a lot of fun and can be completed in an hour or two.
Click here to see the project in full (#22)
Wood Address Sign

This functional project is better suited for kids later on in grade school. This project is great because it does involve some finishing work, but it is very minimal and not hard for your child to do. It involves making a sign out of wood that you and your family can walk by every day if you use it as your new address sign.
To create this sign, you can use any type of wood. I recycled an old wooden fence board, but any piece of wood will work. You’ll want to use a miter saw to cut it down to size, or you can use a circular saw if preferred. I stained the board a nice warm color, but you could opt for paint instead if you prefer. Pick up some address numbers at a local home improvement store and affix them to the wood with the screws provided. Make sure you plan out their placement in advance so you end up with numbers that are straight and square!
Click here to see the project in full (#5)
Be safe and have fun!
You may also enjoy reading Messages Beyond Movement: Partner Yoga For Kids by Mariam Gates