Is yoga beneficial for sciatica? Yes! Here are the 7 best yoga poses for sciatica pain
—
If you have sciatica, you know how challenging it can be to get through daily life without pain. But there is a solution that could help relieve your pain and assist your recovery.
Yoga is well-known for benefits centering on flexibility, core strength, and mindfulness. But it’s also a great way to treat a variety of ailments, including sciatica. Yoga can help you build strength, alleviate pain, and may even help improve your quality of life.
Below, we’ll dive into how it can help including the best poses for sciatica relief…
What Is Sciatica?
When you have pain along your sciatic nerve, this is referred to as “sciatica.” The sciatic nerve is the longest in the human body, beginning in your lower back and traveling through the backs of your legs to your feet. When you have sciatica pain, you may feel sensations akin to burning, tingling, or numbness. This pain can range from slight to severe discomfort, often making menial tasks difficult to complete.
Sciatica has a number of different causes. Anything from inflammation to irritation to pinched nerves or a herniated disc. Compression can also cause sciatic issues, as can conditions like pregnancy or obesity. Severe cases may require surgery to correct this issue, but yoga can be beneficial in milder cases.
Yoga can help relieve sciatica pain by stretching and strengthening the affected areas such as the lower back and legs. Certain poses aim to realign the back and improve posture, which helps reduce the symptoms and associated risks of sciatica.
The Best Yoga Poses for Sciatica Pain
All of the following poses for sciatica relief can be achieved with a beginner’s level of experience or modified to accommodate for less flexibility. You can also employ any modifications that feel comfortable or are safer for you.
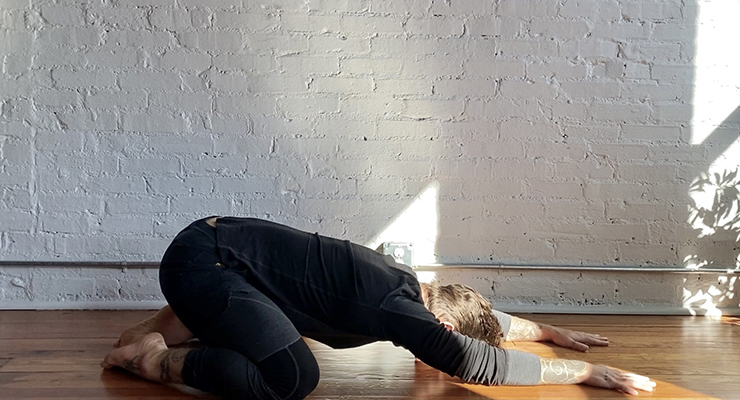
Child’s Pose (Balasana)
Child’s Pose aims to strengthen and lengthen your spine as well as relax your entire body. This pose also stretches your hips, thighs, and lower back to increase flexibility and openness through these areas.
This is also a great pose to return to whenever you feel tired or overexerted. You can rest easy in this position, and the points of contact on your body will help to re-center your focus.
- Begin on your hands and knees.
- Sink backward onto your heels, keeping your arms extended above your head.
- Rest with your knees on either side of your torso and your forehead against the yoga mat. If necessary, use a pillow under your chest, forehead, or thighs for extra support.
- Allow yourself to completely relax.
- Breathe deep and hold this pose for up to five minutes.
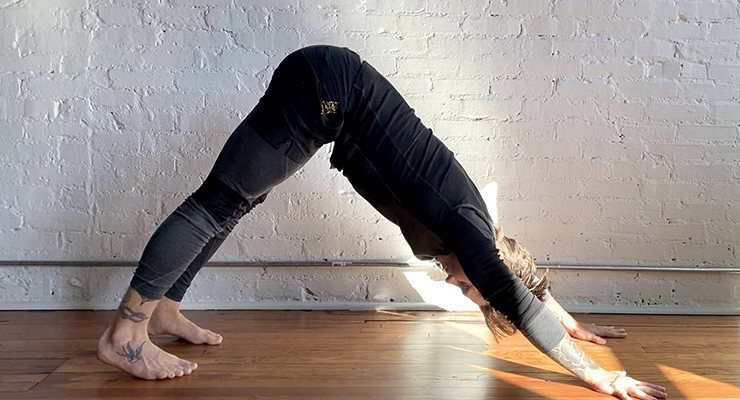
Downward-Facing Dog (Adho mukha svanasana)
This pose helps to realign your spine while also providing relief from pain and lower back tension. Beyond its advantages for sciatica, Downward-Facing Dog also promotes balance and strength for your entire body.
- Begin on your hands and knees.
- Raise your hips and push into your hands to bring yourself into an upside-down “V” position.
- Straighten your back and neck to keep your head aligned with your arms.
- Relax your shoulders and breathe deep.
- Bend your knees slightly for a greater stretch through your lower back.
- For further intensity, slowly peddle your feet (lift one heel as the other drops, and repeat on the other side).
- Hold this pose for up to one minute.
Cobbler’s Pose (Baddha Konasana)
Also known as the Bound Angle Pose or the Butterfly Hinge, the Cobbler’s Pose opens your hips and relieves the tension in your lower back.
- Begin seated on your mat.
- Place the soles of your feet together, similar to the butterfly stretch.
- Allow your knees to fall gently into an open position. For extra support, use pillows under your knees.
- Sit up straight and tall to lengthen your spine, breathing deep.
- For a more challenging position, bend at the waist and walk your hands forward on your mat until you are folded over your legs.
- Hold your folded position for about thirty seconds at a time and an upright position for up to one minute.
This pose might increase discomfort when the additional forward bend is attempted. If this is the case, avoid the bend and instead stick with the upright position as a modification.
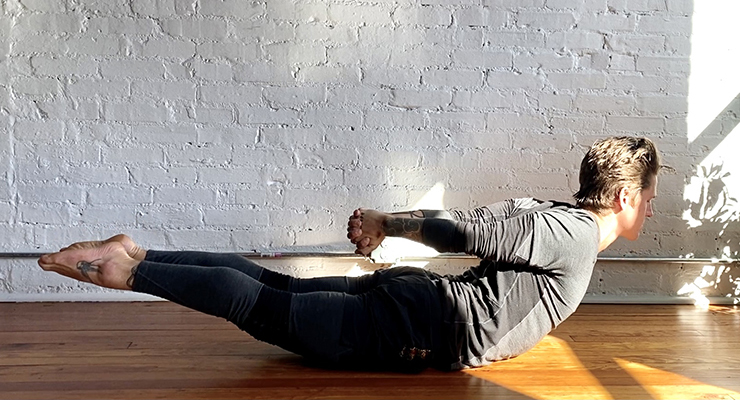
Locust Pose (Salabhasana)
This pose helps to bring stability to your core and lower back while also strengthening your spine, thighs, and glutes. In addition to helping sciatica symptoms, it also helps with circulation and flexibility through your hips. A controlled movement will better increase your strength and decrease the risk of pulling a muscle.
- Begin lying on your stomach.
- Slowly raise your head and shoulders off the mat as high as possible while lifting your arms behind yourself.
- Lift both or one of your legs off the mat for a greater challenge, engaging your core and your glutes.
- Breathe as deeply as possible.
- Hold this pose for up to thirty seconds at a time.
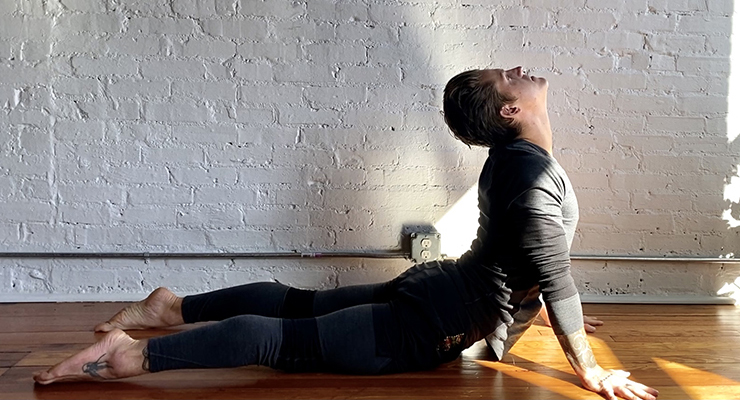
Cobra Pose (Bhujangasana)
Similar to the Locust Pose, the Cobra Pose strengthens and stabilizes your spine. It also promotes circulation and helps to strengthen your glutes. The key with this pose is to invoke good posture by putting your shoulders back and opening your chest. This will help to better align your spine and take any pressure off your lower back.
- Begin lying on your stomach.
- Bring your hands up to your shoulders and place them firmly on the mat.
- Lift your shoulders and chest while inhaling deeply, keeping your elbows close to your sides.
- Open your shoulders to keeping your chest open while descending your shoulder blades.
- Engage your abdominal muscles and thighs.
- Breathe and hold for at least thirty seconds.
For a modified Cobra Pose, keep your forearms on the mat instead of just your palms.
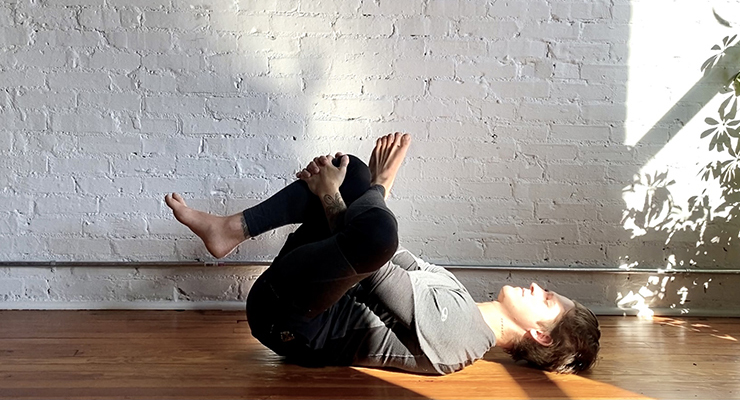
Reclined Pigeon Pose (Supta Kapotasana)
This version of the Pigeon Pose helps to take the strain off your lower back while stabilizing your position. Pressure is alleviated from your hips as you stretch your glutes, hips, and piriformis muscle, a muscle found in the hip that can cause sciatica by being too tight.
- Begin laying on your back.
- With knees bent, place your feet flat on the floor.
- Lift your left leg and put your left ankle over top of your right knee to form a number “4” shape.
- If you feel a deep stretch, stop here.
- For a more intense stretch, lift your right foot off the ground.
- Bring your hands around the back of your right thigh and lace your fingers together to hold your leg as close to your chest as you like.
- Breathe and hold for up to one minute.
- Repeat for the other leg.
If this pose is too difficult even with your foot on the floor, try moving it further away from your body. This will soften the angle of your knee and put your crossed ankle at a less severe angle to the hip you are stretching.
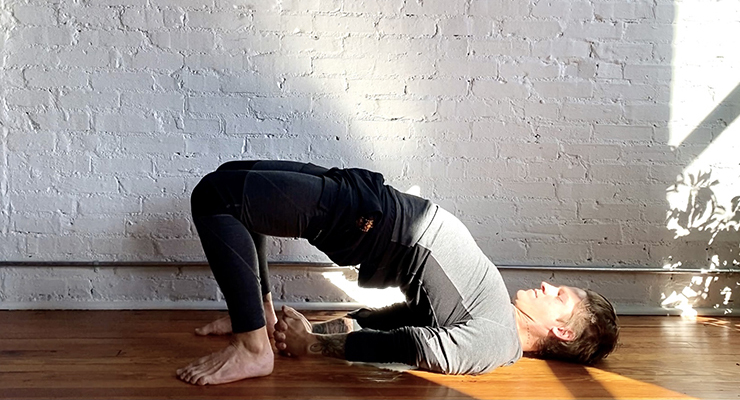
Bridge Pose (Setu Bandha Sarvangasana)
Predominantly known as an abdominal exercise, the Bridge Pose helps to strengthen and stabilize your core. It also stretches the front of your spine and hip flexors while building musculature in your glutes and thighs.
- Lie on your back with your knees bent and feet flat on the floor.
- Leave your arms at your sides with your hand’s palm down.
- Lift your hips up from the floor to make a straight line from your knees to your shoulders. Keep your hips level to prevent rotation or a twisted torso.
- If required, use a pillow between your knees to keep them apart and help with alignment.
- Hold in place for up to one minute.
You may also enjoy Best Self Yoga Flow for Flexibility and Relaxation with Carter Miles

